

Scan to PDF
Turn document photos into a clean PDF in your browser. Auto crop finds the paper, corrects an angled page, and removes the background. Check the corners, choose Auto clean, Black and white, Grayscale, Colour, or Original, then reorder the pages and create the PDF. Frisqoo does not upload the source file for processing.
100% private. Your files are processed entirely in your browser and never uploaded.
Why scan to PDF with frisqoo
Local processing
Processing runs locally in your browser. Frisqoo does not upload source files for this task.
Auto clean
Whitens the paper and lifts the text so a phone photo looks like a real scan.
Crisp black and white
An automatic threshold gives sharp text on white and the smallest files.
Crop and straighten
Find the paper automatically or move four corner points by hand.
Free to use
No sign-up or watermark. Very large jobs depend on available device memory.
Desktop and mobile
Runs in current desktop and mobile browsers with nothing to install.
How to scan documents to PDF
- Add photos of your document by dropping them in the box above, or click to browse and pick them.
- Check the detected page edges, pick a scan style and brightness, then rotate and reorder the pages and choose a page size.
- Click Create PDF to download the cleaned file as
frisqoo_scan.pdf. A single photo keeps its own name.
Everything runs on your device, so the build is fast and your documents stay private, even with no internet once the page has loaded.
Start with clear document photos
Place the paper on a surface that contrasts with its edges, hold the camera above it, and include all four corners in the frame. A slight angle is fine because the scanner corrects perspective. Avoid covering a corner with a finger, pen, clip, or deep shadow, since the edge detector needs to distinguish the page from the background.
Add one photo for each PDF page. JPG, JPEG, PNG, WebP, AVIF, BMP, GIF, TIFF, and SVG files are accepted, and formats can be mixed in one document. JPEG orientation data is read before processing, so a phone photo that carries an orientation tag starts upright. A photo that cannot be decoded is skipped instead of stopping the readable pages.
On a phone with a rear camera, the editor can offer a camera tile for taking the next page. Each tap creates one page, which is useful for moving through a short stack without leaving the scanner. Files selected from Photos, Files, Finder, or File Explorer work as well.
For small print, move closer instead of zooming digitally and tap the page to focus before taking the photo. Soft light from both sides is easier to clean than direct flash, which can leave a bright patch on glossy paper. Flatten folded receipts or curled pages so their text stays in the same focus plane.
Choosing a scan style
- Auto clean: balances colour and contrast so paper looks white and text pops. Best for most photos.
- Black and white: crisp ink on white using an automatic threshold. Best for plain text pages and the smallest files.
- Grayscale: shades of gray with no colour, gentle on mixed pages.
- Colour: a light cleanup that keeps the original colours, good for forms and receipts.
- Original: no cleanup, the photo goes in as is.
A Lighter or Darker adjustment fine-tunes any style, so a dim photo can be lifted and a washed-out page can be darkened. The choice applies to the document, and every thumbnail updates before export. Auto clean is the best starting point for mixed paperwork. Black and white is better for text-only pages with uneven lighting, while Colour protects stamps, signatures, diagrams, and highlighted text.
Crop and straighten the paper
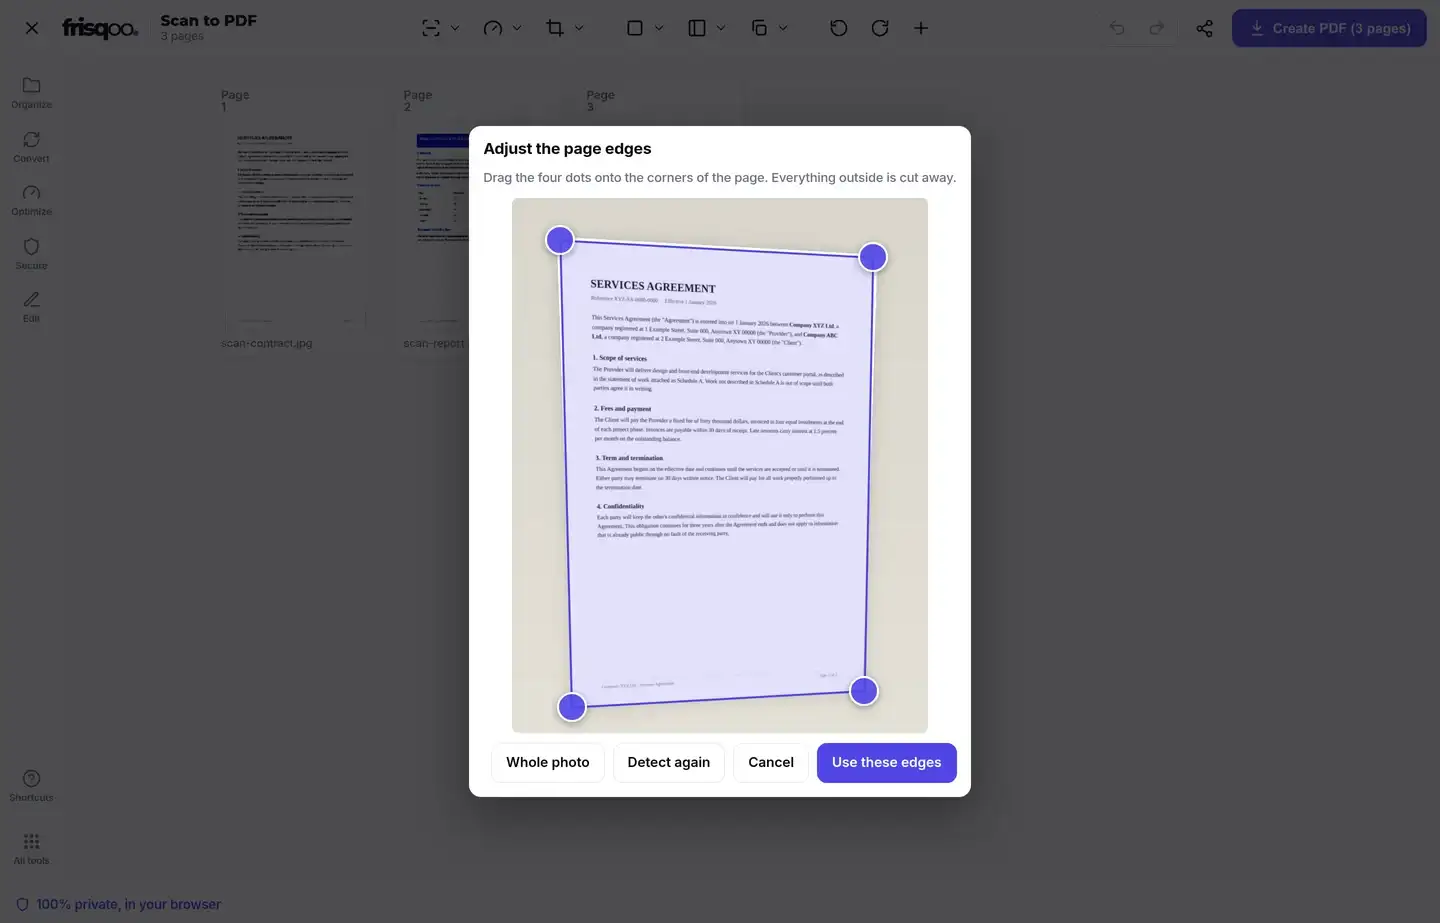
Auto crop and straighten detects a four-corner outline on each photo. Everything outside that shape is removed, and the selected quadrilateral is warped into a flat rectangle. The same stored corners drive both the preview and the exported page, so the crop you approve is the crop written into the PDF.
Select Adjust page edges on a thumbnail when a shadow, patterned desk, or object beside the paper pulls a corner away. The original photo opens with four draggable dots. Move each dot onto the matching paper corner, choose Detect again for another automatic attempt, or choose Whole photo when the background belongs in the result. Use these edges saves the correction.
The corner controls also work from a keyboard. Focus a corner and use the arrow keys for small movements or Shift plus an arrow for a larger step. This gives a precise option when dragging a point on a small phone screen is difficult. If no edge is found, the dialog keeps the whole-photo corners available for manual placement.
When to use black and white
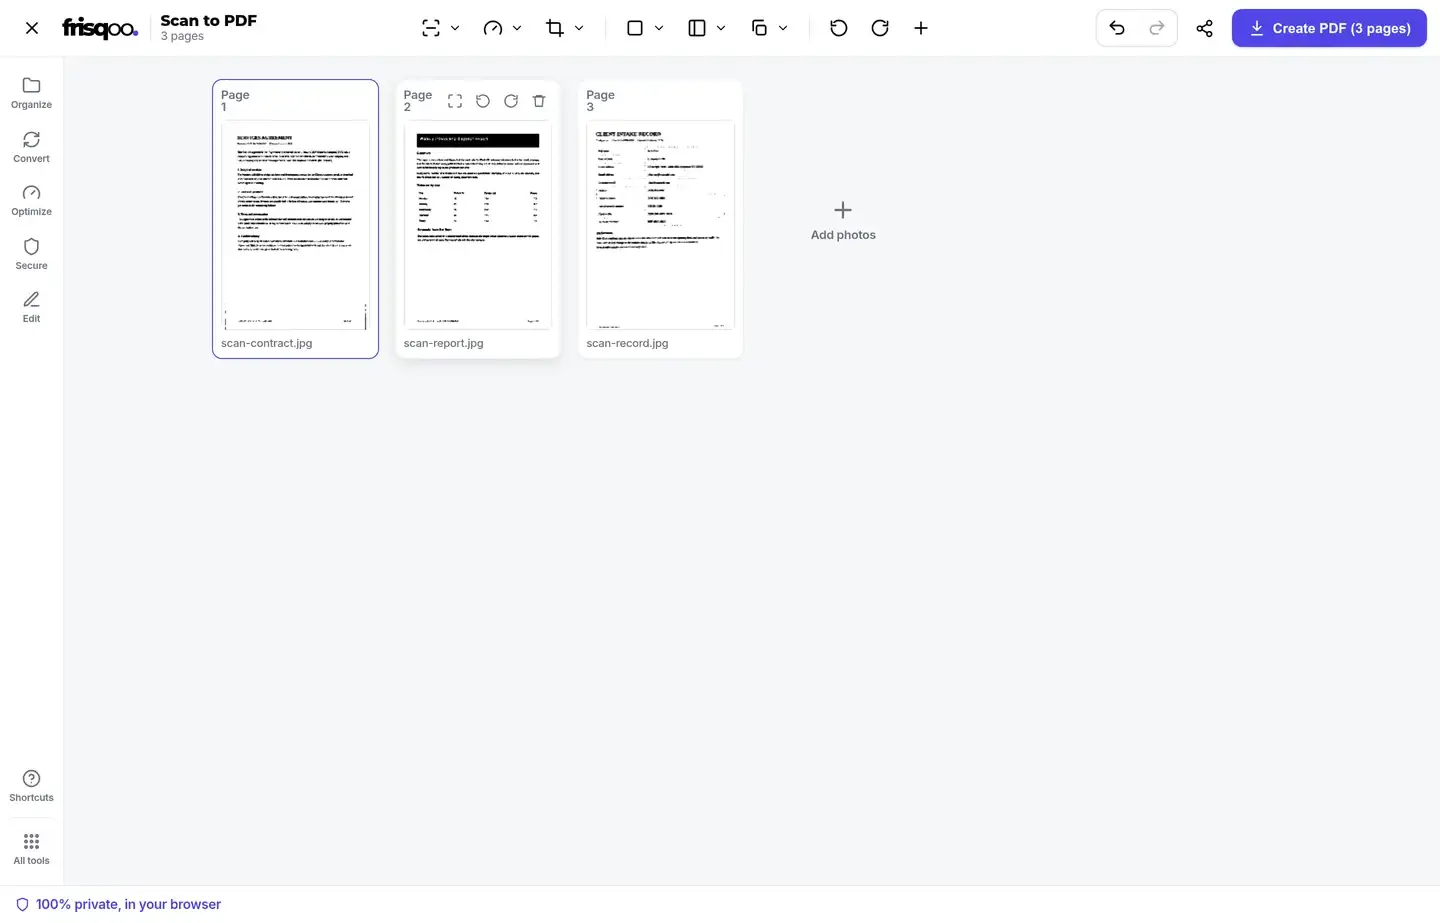
Black and white separates dark marks from light paper with an automatic threshold. It works well for typed letters, contracts, printed forms, and receipts where colour carries no meaning. The result is stored as a lossless page image so thin strokes and small characters remain sharp.
Use Grayscale when the page contains pencil, faint handwriting, shaded boxes, or photographs that need tone but not colour. Use Colour for stamps, signatures, illustrations, highlighted notes, and IDs. Original keeps the decoded photo without tone cleanup, although edge correction, rotation, and page layout still apply when selected.
Do you get selectable text?
Each page is built from a cleaned picture, so its words remain pixels and cannot be selected or searched. This scanner does not guess at the text or alter what the photographed page says. When you need Ctrl+F, copying, or assistive reading, send the finished file to OCR PDF. OCR adds a searchable text layer behind the page image while keeping the visible scan.
Scan first and run OCR second. Cropping away the desk, correcting perspective, and improving contrast gives text recognition a cleaner page to read. Check the OCR result when the source contains handwriting, decorative fonts, faint print, or several languages, since recognition quality depends on the photo.
Put your pages in the right order first
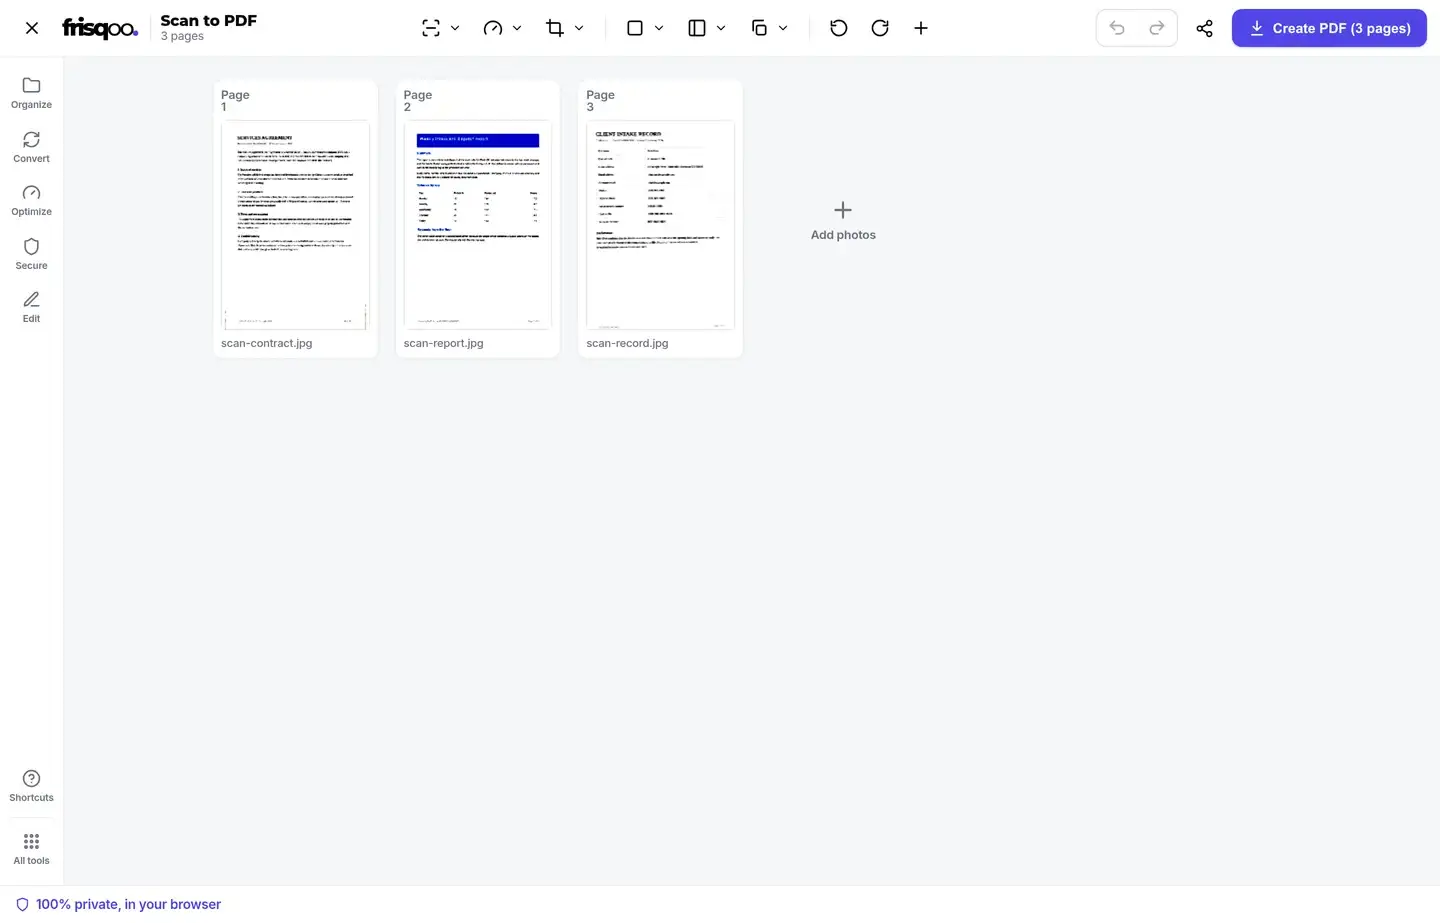
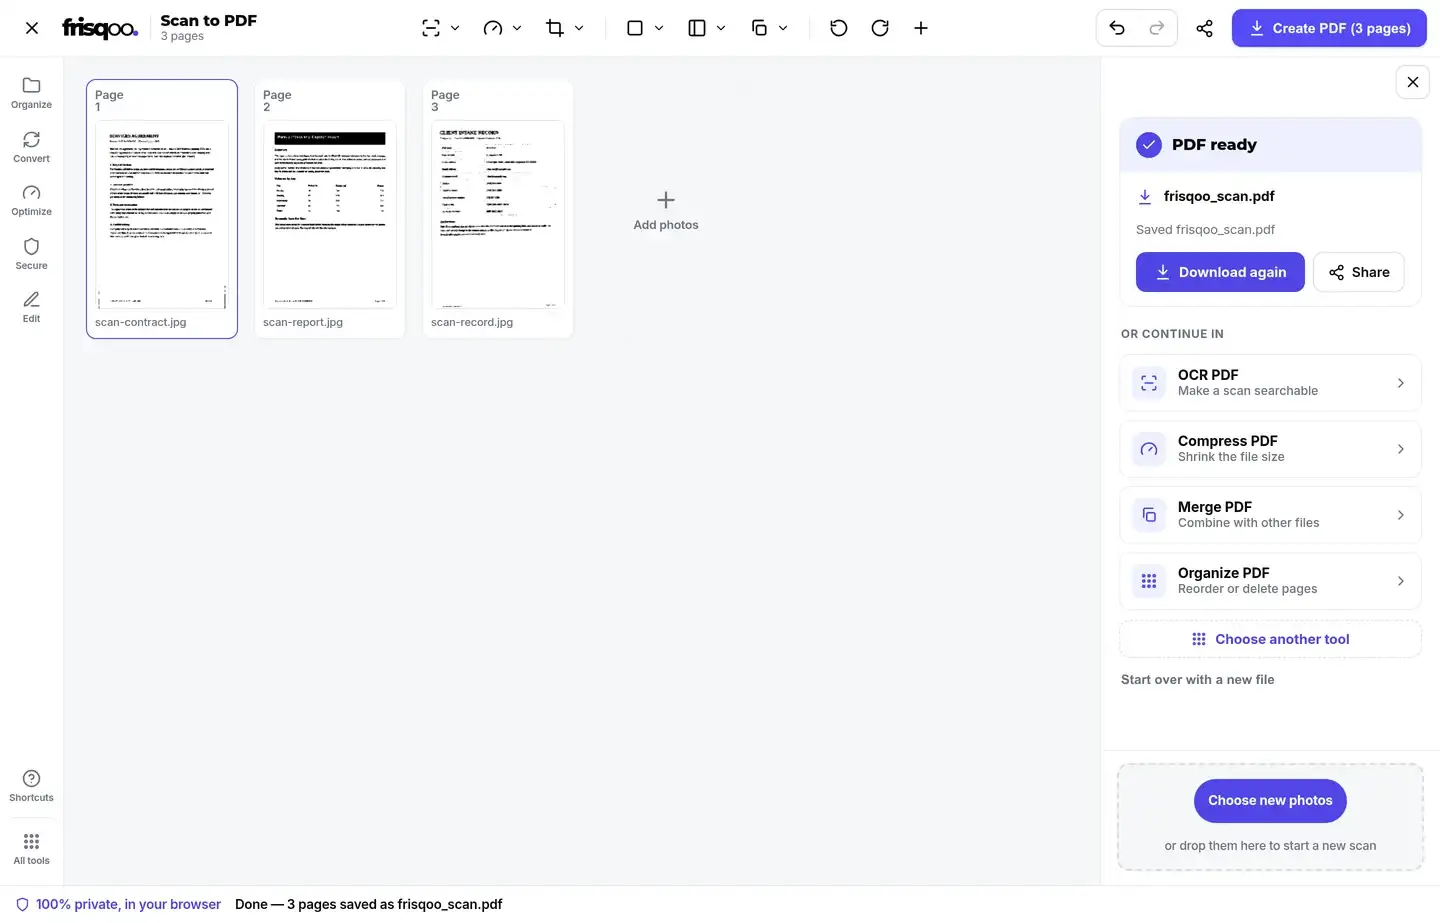
After you add your photos, each one shows up as a page thumbnail. Drag any thumbnail to move it up or down. On a computer, click and drag; on a phone or tablet, press and hold the thumbnail until it lifts, then drag it into place. The final PDF follows the order on screen, top to bottom. Each thumbnail also has rotate buttons for sideways shots and a trash button to drop a page you do not need, without touching the originals on your device.
Rotate all left and Rotate all right turn the whole set, while the buttons on a thumbnail change only that page. Add photos appends more images without restarting. Undo and redo are available for changes made in the editor, so an accidental reorder, rotation, removal, or setting change can be reversed before the PDF is created.
Choosing a page size
A4 and Letter place each cleaned image on a standard PDF sheet. The default None margin uses as much of the sheet as the image proportions allow. Small and Large create an even inset around it. The image is scaled to fit inside the available area without stretching or cutting off its content.
Auto orientation follows each cleaned page: a wide page uses landscape and a tall page uses portrait. Choose Portrait or Landscape to force the same orientation across the document. Fit to image skips the paper preset and makes each PDF page match the processed image exactly, edge to edge; margin and orientation controls are not needed in that mode.
Is it safe to scan documents here?
The photos are decoded, cropped, cleaned, and assembled inside your browser. They are not sent to a conversion server. The downloaded PDF is created on the same device, and closing the page clears the working session. The source photos in your camera roll or folder are not changed.
Local processing reduces exposure, but the finished PDF still contains the visible information in every photographed page. Review the preview for documents, faces, addresses, account numbers, and background objects you did not intend to share. Remove an unwanted page or adjust its crop before downloading.
What to do after you build the PDF
Select Create PDF when the page order and previews are correct. A multi-page document downloads as frisqoo_scan.pdf. When the scan contains one photo, the output keeps that photo's base name and changes the extension to .pdf. If one image cannot be read, the status reports that it was skipped while readable pages still finish.
The result panel offers Download again and Share. It can also pass the generated file directly to OCR PDF, Compress PDF, Merge PDF, or Organize pages. Use JPG to PDF instead when the images should be placed into a document without page detection or scan cleanup.
Can I scan to PDF on my phone?
Yes. Open the page in a modern mobile browser, choose existing photos, or use the rear-camera option when it is offered. Take one photo per page, check the corners and order, then tap Create PDF. The file saves through the browser's normal download flow.
Many iPhones convert a photo chosen from the Photo Library to JPEG before handing it to a web page. A raw HEIC or HEIF file selected through Files or copied to a desktop may not decode in every browser. If it is skipped, save or export a JPEG copy and add that version.
Common ways people use Scan to PDF
- Turning phone photos of a paper form into a clean multi-page PDF.
- Scanning receipts and invoices into one tidy file for expenses.
- Making crisp black and white copies of contracts and letters.
- Capturing handwritten notes or whiteboards as readable pages.
- Digitising ID cards, certificates, and records to keep or print.
FAQs about Scan to PDF
Do my photos get uploaded?
No. Your photos are read and cleaned up on your own device, inside the browser. Nothing goes to a server, so your documents stay private. Close the tab and nothing is left behind.
What does the scan cleanup actually do?
Each page is processed with a scan style. Auto clean balances the colours and stretches the contrast so the paper looks white and the text stands out, which suits most photos. Black and white turns the page into crisp black text on a white background using an automatic threshold, ideal for plain text pages. Grayscale keeps shades of gray without colour. Colour gives a gentle cleanup while keeping the original colours, good for forms and photos. Original leaves the picture untouched. A Lighter or Darker adjustment fine-tunes any style.
How does automatic cropping work?
Auto crop and straighten looks for the four edges of the paper, cuts away the desk or background, and corrects the perspective so an angled phone photo becomes a flat rectangular page. Select Adjust page edges on any thumbnail to move the four corner points, detect them again, or keep the whole photo.
Will the text in my PDF be selectable or searchable?
Not on its own. This tool builds each page from a cleaned-up picture, so the words are part of the image and cannot be selected or searched yet. To add a searchable text layer, run the finished file through our OCR PDF tool. The two work well together: scan and clean here, then OCR to make it searchable.
What image formats can I use?
You can add JPG, JPEG, PNG, WebP, AVIF, BMP, GIF, TIFF and SVG photos and mix formats freely. Each image becomes one page, in the order shown. Photos taken on a phone are stood upright automatically using their orientation tag.
What about HEIC or HEIF photos from my iPhone?
HEIC and HEIF (the format newer iPhones use) can't be opened directly, because most web browsers don't support these files on their own. The easy fix: when you add a photo straight from your iPhone Photo Library, it is shared as a JPG automatically and works here. If you instead pick a raw .heic file from the Files app or a desktop computer, convert it to JPG first.
Can I reorder and rotate the pages?
Yes. Drag any thumbnail into a new spot to set the page order. On a phone or tablet, press and hold a thumbnail until it lifts, then drag it where you want. Each thumbnail has rotate-left and rotate-right buttons for sideways photos, and a trash button to remove one you added by mistake.
Can I scan more than one page?
Yes. Add as many photos as you like and each one becomes a page in the final PDF, in list order. It is the quick way to turn a stack of paper into a single multi-page document.
Can I control the page size?
Yes. A4 or Letter place each cleaned page on a standard sheet, which prints neatly. Fit to image makes each page match its photo exactly, edge to edge. When you choose A4 or Letter you can also set the layout and margin.
Does the cleanup change my original photos?
No. The originals on your device are never modified. The cleanup happens on a copy as the PDF is built, so you can try different styles and rebuild as often as you like.
Why does black and white look so clean?
Black and white uses an automatic threshold that separates ink from paper, so shadows, page tint and uneven lighting drop away and you are left with sharp text on white. It gives the smallest files too. If a page has photos or coloured details you want to keep, use Auto clean or Colour instead.
Is it good for receipts, notes and forms?
Yes. Snap a photo of a receipt, a handwritten note, a contract or a form, and the cleanup lifts the text off the background so it reads like a real scan. Processing runs locally in your browser, and Frisqoo does not upload the source photos.
Is it free?
Yes. No sign-up, no watermark, no page limit. It works the same on phones, tablets and computers in current desktop and mobile browsers.